The Basics
Creating a form using Go With Form is fun, easy and intuitive. Our forms provide you with features ranging from pure basics to highly advanced, allowing you to completely customize data collection from your users. These features allow you take your form creation to a whole new level.
We start off with the basics. This is a tutorial on how to create a Form using Go Form Builder. It is quite simple and intuitive, whereby you will get an idea of all features that you can use in building one.
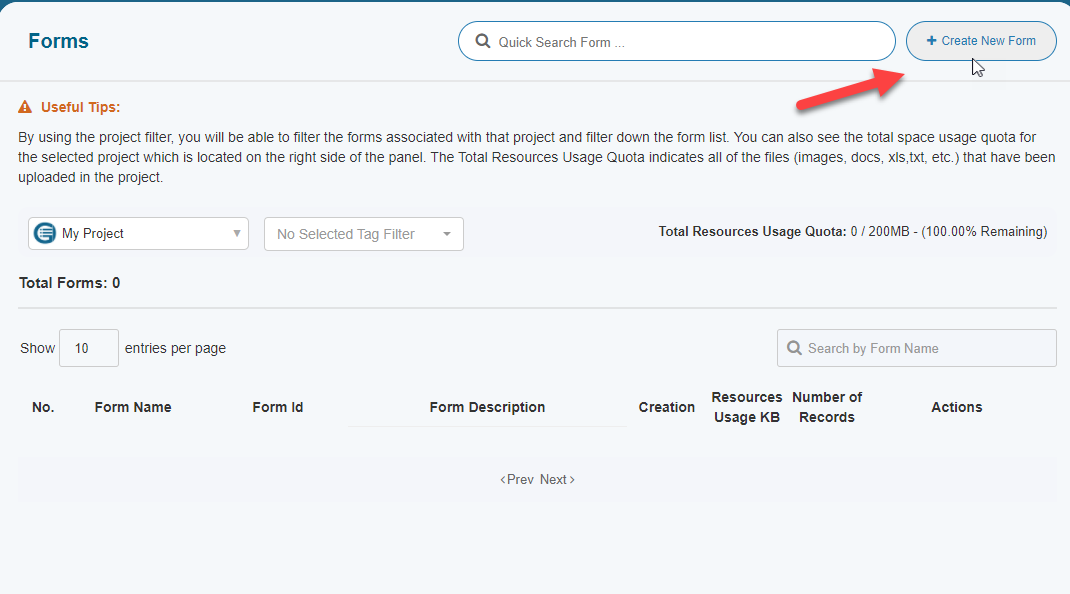
To start off, you need to login. Once inside the Dashboard, click on Create a new Form at the top right corner.
A new popup dialog will appear from where you can select any option that suits your needs to create this form. Let’s go over them one by one:
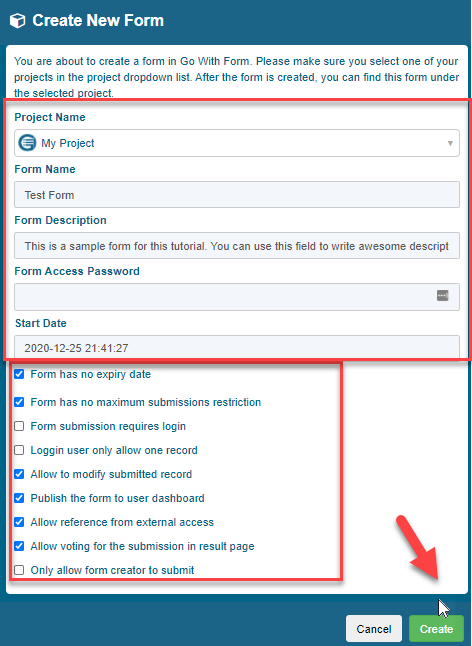
a. Project Name - Type your Project Name here. You can divide forms according to the projects you have. There is no limit to how many you can create under each project. Plus, it also helps you to categorize your forms under each project.
b. Form Name - Type your Form Name here.
c. Form Description - This is the description of your form that will be displayed right after the form name on the display page. It is important you specify a description as it will help you and your users in knowing what purpose this form serves.
d. Form Access Password - If you want the form only accessible by a selected group of users, please specify one here to make it password-protected.
e. Start Date - Specify the date and time when users will be able to access and submit data.
f. End Date - Specify the end date and time in case you want it time-restricted.
g. Form has no expiry date - If you check this option, all you need is a start date and time. The form will continue working for your users as it will never expire. Once you check this option, the End Date will disappear.
h. Form has no maximum submission restrictions - Check this option if you want maximum responses with zero restrictions. There will be no limitation and a user can resubmit the form using the same IP address.
i. Form submission requires login - There are a number of projects and forms you can create with no limits in Go With Form. As such, you are also able to specify whether a new user can submit responses with or without logging on. If you check this box, the user will be required to create and login for that specific project under which you have created this form. Let’s suppose you created 10 different forms under one project. Your users will only have to create an account once for the project and he/she will have access to all 10 forms that they can submit. In short, users will have to be logged in to submit their forms.
j. Logged in user only allow one record - Once logged in, users can only record one response per form submission.
k. Allow to modify submitted record - Do you want final responses? If yes, then do not check this option. Users will NOT be able to modify their recorded responses once they hit the Submit button.
l. Publish this form to the user dashboard – Users can check the details of this form in their dashboards.
m. Allow reference from external access – This allows you to import references from other forms within Go With Form. For example, you can import external user registration data from another form in your current form.
n. Allow voting for the submission in result page - Check this option if you want users to be able to vote for the submission on the results page.
o. Only allow form creator to submit – Only the form creator is allowed to submit the data.
Alright, now’s the time to create the form. Click Create and you will be redirected to the form page. Now all you have is a blank page with all of the options.
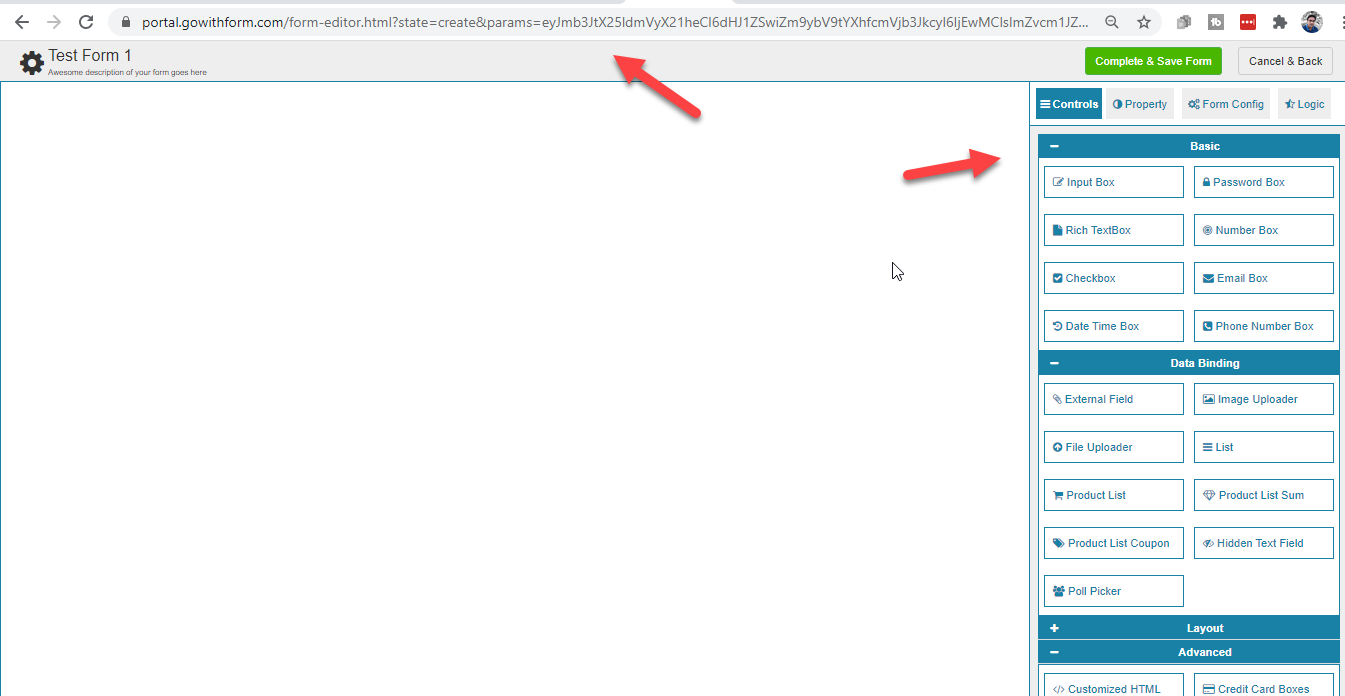
Let’s explore options on the right where you will be able to add in all of the data, create the form and publish it:
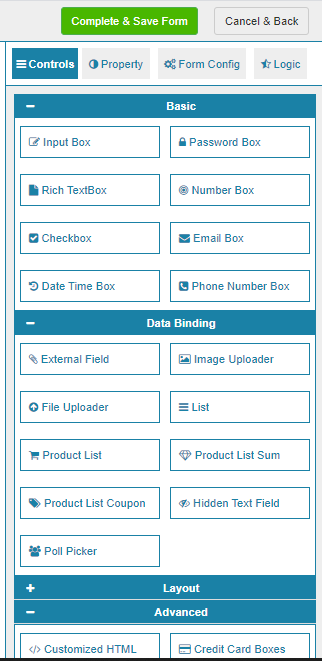
a. Input Box - An input where you can enter up to a line of text
b. Password Box - Input where your users can enter their passwords
c. Rich Textbox - An improved version of Input box. Allows you to add as much text as your users want.
d. Number Box - Gives your users the ability to add numbers
e. Checkbox - Add in checkboxes as you deem appropriate
f. Email Box - An input field for email addresses
g. Date Time Box - An input field to select the date and time
h. Phone Number Box - An input field to add number