Advanced Settings
Form Record Unique ID#
Each submission has an unique form record ID associated with it. We have made it flexible for you to customize your own unique form record ID pattern. You can treat this unique ID as an identification for different purpose such as membership IDs, registration IDs, etc.
There are three ways to generate the unique ID for each form record submitted. They are UUID, Incremental Numbering, and Custom Rule.
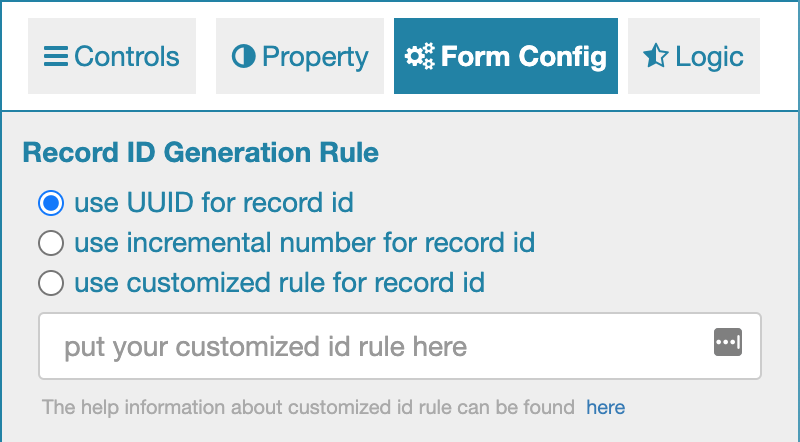
UUID#
This option will randomly generate a 32 characters of UUID as the form record ID.
Incremental Numbering#
This option will use auto increment numbering starting from 1 for any form records submitted.
Custom Rule#
There is the flexibility to combine UUID and Incremental Numbering as the unique ID of each form record.
You can code your own rule with the defined syntax {UUID} and {AutoInt}.
Submission and Confirmation#
You can customize the submit button and the post-submit actions.
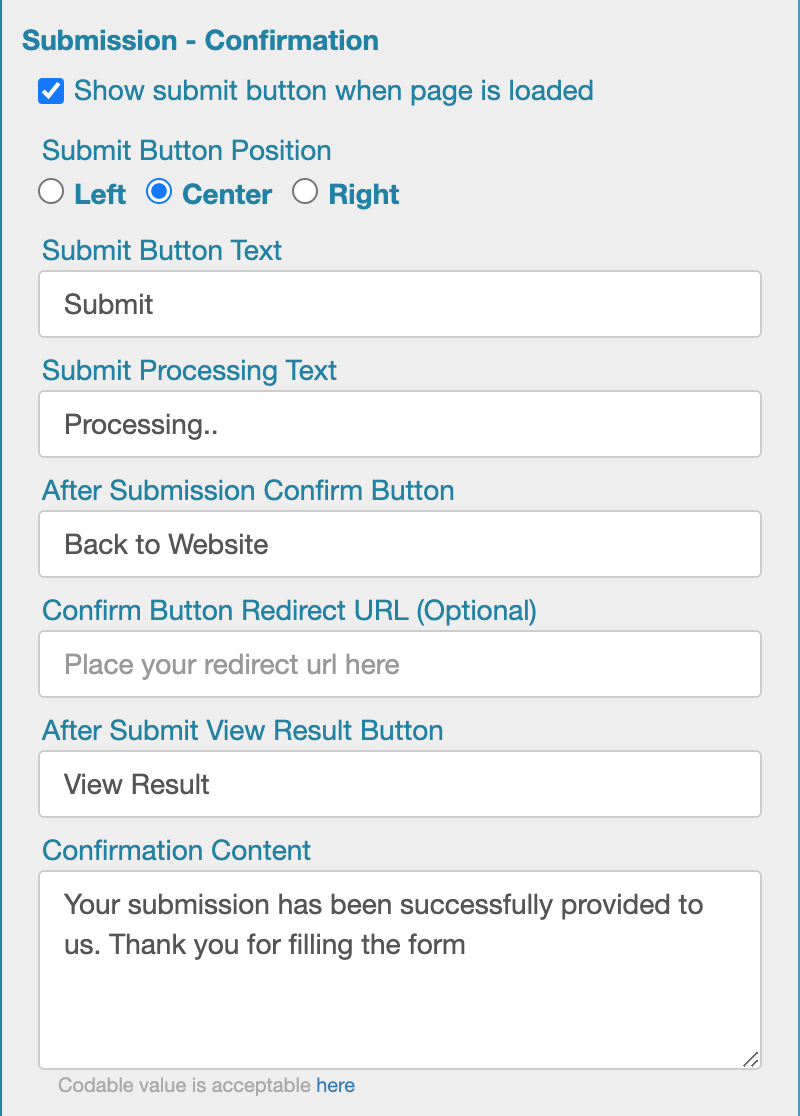
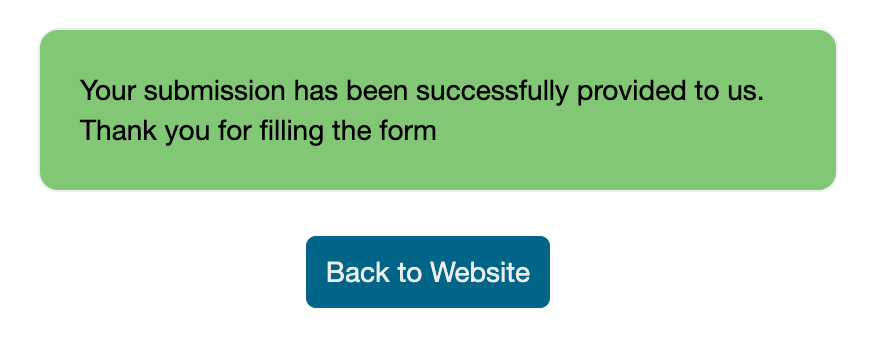
Show submit button when page is loaded- you can either show or hide the submit button when the form rendersSubmit button position- adjust the position of the submit buttonSubmit button text- the text to be displayed on the submit buttonSubmit processing text- the text to be displayed on the submit button after user clicked and waiting for response from serverAfter submission confirm button- the text to be displayed on the confirm button after response has been receivedConfirm button redirect url (optional)- the url to be redirected after the confirm button is clickedConfirmation content- the text to be displayed after a form record has been submitted successfully. Codable values supportedAfter submit view result button- the text to be displayed on the view result button after submission. NOTE: this is dependent on enabling the optionShow record list after submission. See section Record List for more info.
Record List config enabled

Record List config disabled
Email Notification Rules#
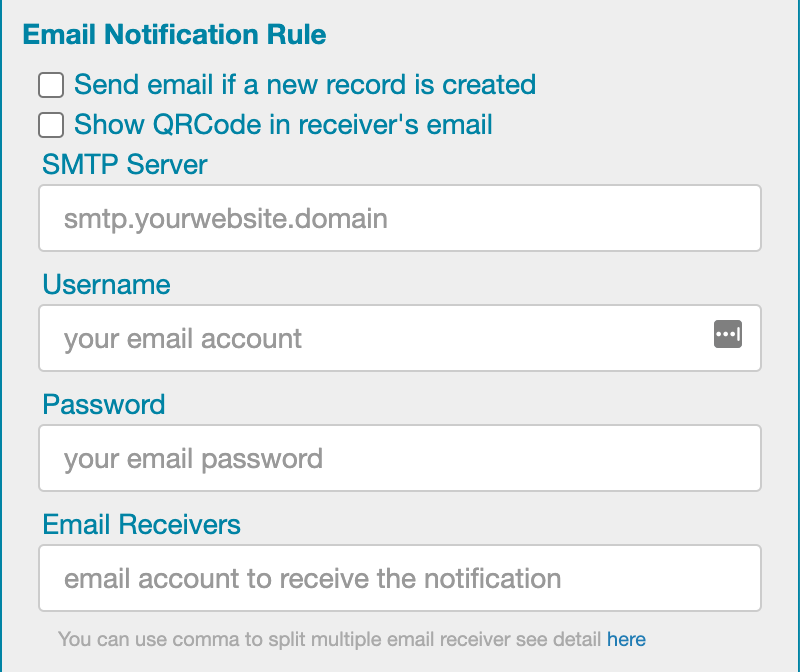
Send email if a new record is created- send out a confirmation email to the person who submitted the form. NOTE: anEmail Boxcontrol need to be present in the form.Show QR Code in receiver's email- generate a QR code based on the submitted uniqueform record IDand attach in the email. This QR code can be scanned by Go With Form'sQRCode Check-inmodule or other QR code scanners.
QR Code
This QR Code represents the unique form record ID that the user submitted. It is especially useful for referencing and lookup this record when needed.
SMTP Server (Optional)- you have the ability to use your own SMTP server to send out emails. If you would like to send out emails using your own email address as the sender then please provide the SMTP server address, username, and password. Otherwise, you can also leave it blank and any outgoing emails will be from[email protected]as the sender.Username (Optional)- username for your own SMTP serverPassword (Optional)- password for your own SMTP serverEmail receivers- this is for emailCCpurpose. Emails specified in this option will also receive a copy of confirmation emails. You can specify a list of emails separated by commas.
Email Notification Content#
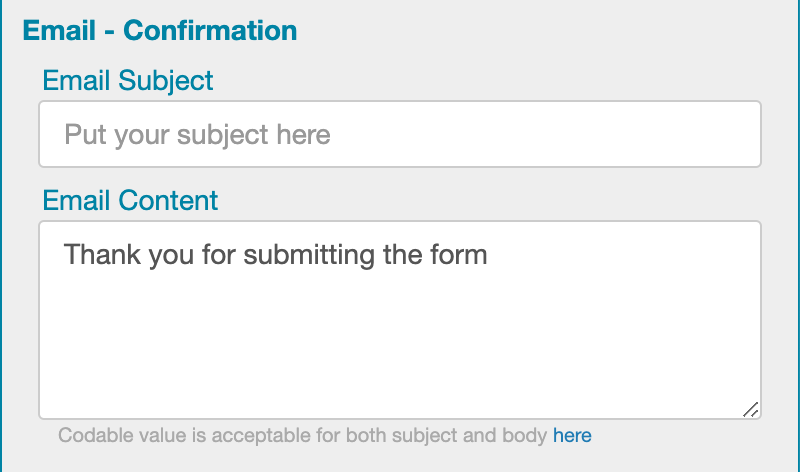
Email Subject- the subject of the confirmation email to be sent. Codable values supported
Email Content- the content of the confirmation email to be sent. Codable values supported
Record List#
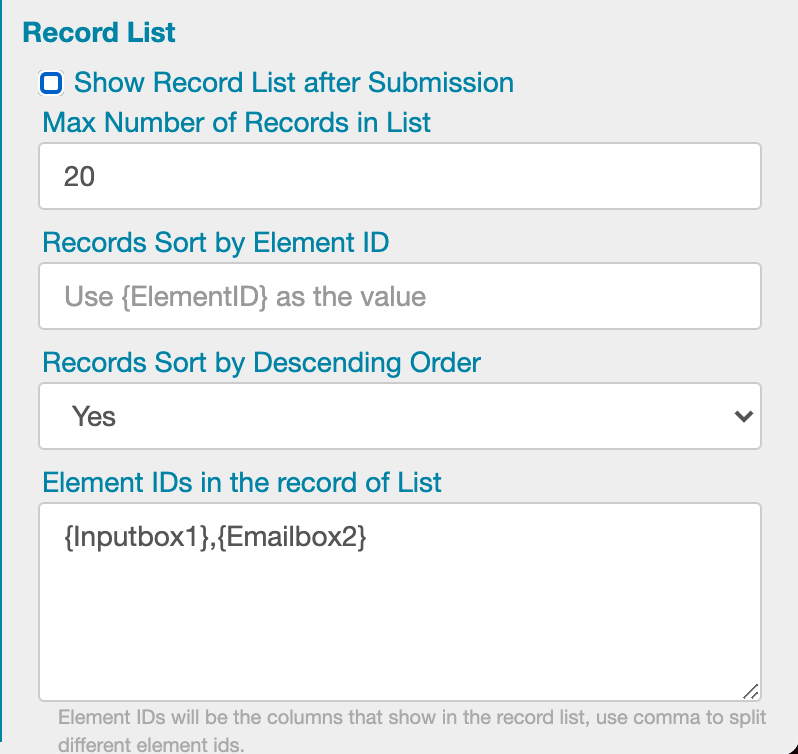
Show record list after submission- enable this option to view results after user clicked on submit button.Max number of records in list- number of records to display in the results listRecords sort by Element ID- theelement IDassociated with the control that you would like to sort when displaying the results listRecords sort by descending order- the sorting order when displaying the results listElement IDs in the record list- the fields that should be displayed in the results list. Each field, also known asControl, has an uniqueelement IDassociated with it in the form. Upon rendering, the field name will be replaced by theTitle Labelfor each of the fields.
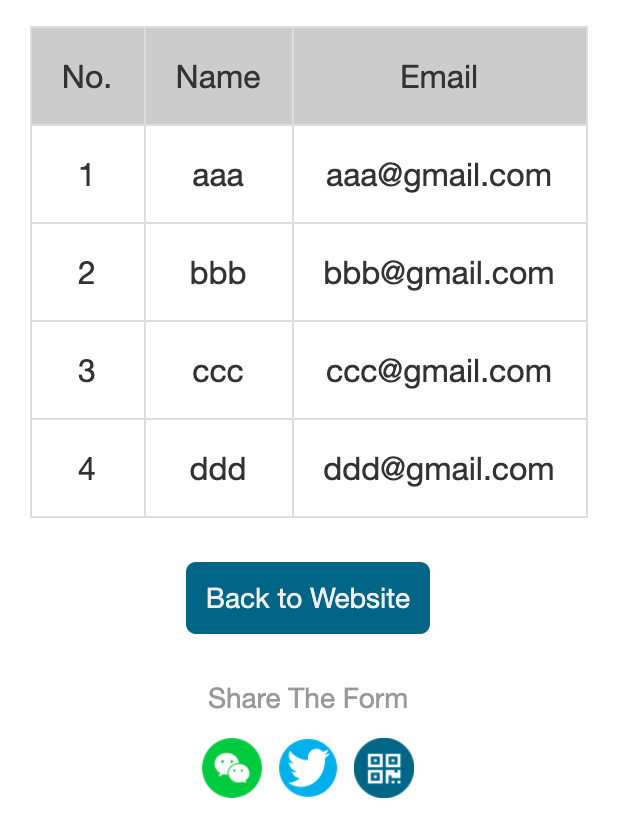
For example, let's say we have two Controls in the form with the following configs.
| Control | Element ID | Title Label |
|---|---|---|
| Input Box | Inputbox1 | Name |
| Email Box | Emailbox2 |
From the above configs, the following results will be displayed after submission.
Codable Values#
The concept of Codable Values is to be able to reference to user inputted values during form submissions. Each Control field has a unique Element ID which can be used in any form config options that supports Codable Values. This is very helpful if you need to solve complicated tasks and business logics while users filling out the forms. This is one of the reason why Go with Form is such a powerful platform for personalized customizations.
Embed Form in Other Website#
GoWithForm offers premium client to embed the form directly in their website, so that to cover the gowithform domain url.
In order to embed the form in your own website. First, you need to have a premium subscription.
Then, create a form in the GoWithForm Portal and copy that form url.
After that, in your own website page. include the GoWithForm form url in a <iframe> to use the GoWithForm form in your website.
The sample code as below, and you can use notitle and nofooter to control whether to show the header of the form (logo, title, description) or footer (share buttons). and you can use cookiecheck to control and disable the cookie permission usage pop up for the page:
Since your website may support desktop and mobile. And sometimes, the GoWithForm form will automatically generate the list or will dynamically adjust the form element (1 row 2 cols become to 2 rows 1 columns). so in this case, if you want to dynamically adjust the iframe size when the user access your page in different platform.
you can use the below script code to control the height of the form.